If you’ve been searching how to crate train an anxious dog without making the anxiety worse, the standard “tough it out” advice is exactly what creates regression. This research-led guide walks through how to crate train an anxious dog the force-free way — Fear Free-aligned, ACVB-aware, paired with separation-anxiety triage and a 7-day desensitization protocol.
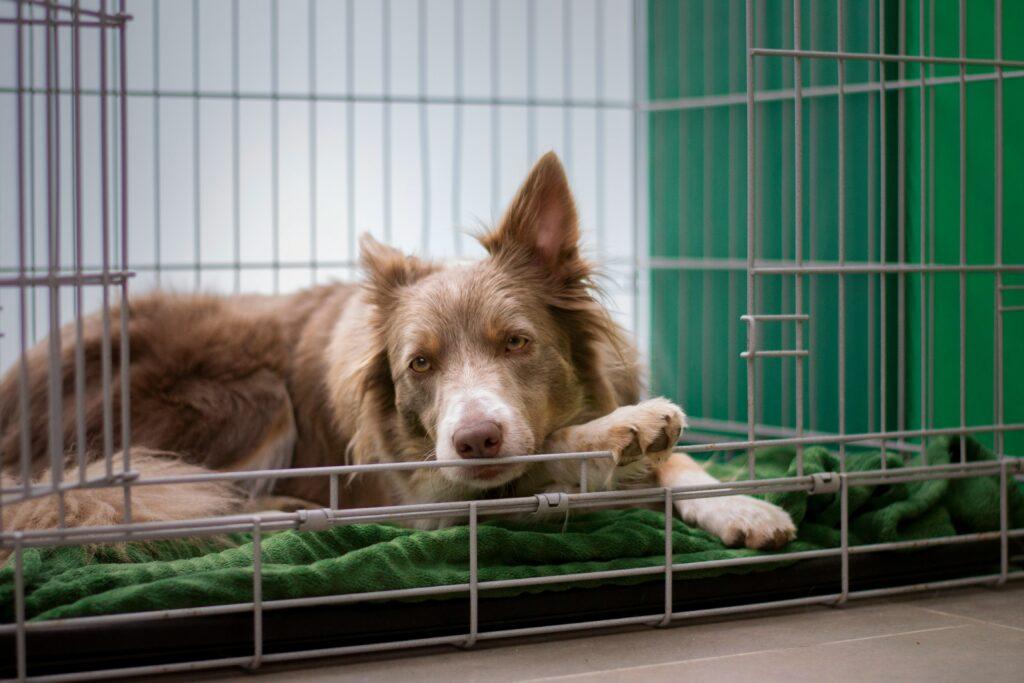
For a genuinely anxious dog — one with previous-owner trauma, a shelter “untrainable” label, or panic at the mere sight of a wire frame — the standard 3-day crate method does not just fail, it deepens the fear (chipped teeth, bloody mouths, flooded cortisol).
This is a research-based protocol grounded in force-free desensitisation and counter-conditioning principles and veterinary-behaviour guidance — built for the hard cases, not just confident puppies. Here is how we research and evaluate.
This isn’t the 3-day method. It takes 2-4 weeks. Some dogs need 8.
But it works — and more importantly, it doesn’t trade short-term compliance for long-term distrust.
Before You Start: Three Things Most Guides Get Wrong
How to crate train an anxious dog: why standard advice backfires
Crate training advice on the internet is wildly optimistic. Most articles assume you have a confident puppy and a Saturday afternoon. If you have an anxious adult dog, ignore those guides. They’ll make things worse.
Three corrections first:
A crate is not a punishment device. Sounds obvious. But if your dog spent 6 months in a crate at a previous home as discipline, the wire frame is now a trauma object. You can’t reset that in a weekend.
Anxious dogs and stubborn dogs are not the same. Stubborn dogs ignore you. Anxious dogs can’t hear you — their cortisol levels are flooded, their amygdala is firing, and the part of the brain that processes “treat = reward” is offline. Forcing them past that threshold isn’t training. It’s flooding, and it’s ethically gross.
Your timeline is wrong. Most guides promise 3-7 days. For anxious dogs, plan for 28 days minimum. If you’re in a hurry, hire a dog sitter instead. Rushing this rewires their fear in concrete.
What you’ll need:
- A crate that fits the anxiety profile — solid sides preferred, escape-proof zippers if soft-sided (see our anxiety-crate picks)
- High-value treats: real meat. Not kibble, not dental sticks. Boiled chicken, freeze-dried liver, string cheese cut into pea-sized chunks.
- A frozen Kong or chew toy that lasts 15+ minutes (tough chew toys that hold up)
- A camera. Phone propped up works. You need to see what they do when you leave.
- Patience. Real patience. Not “I’ll try for a week and see.”
Now the steps.
Step 1: Choose the Right Crate (Day 0)
This step alone determines about 40% of your success. Get this wrong and the next 6 steps don’t matter.
For anxious dogs specifically, you want:
- Solid or partial-solid sides — wire crates feel exposed, like sleeping in a cage at the vet. Most anxious dogs settle better with three opaque walls and a front door.
- Den-like proportions — just big enough to stand and turn around. Bigger isn’t better; oversized crates create a “back corner” that becomes a hiding spot they never leave.
- Escape-proof construction — anxious dogs are escape artists. Cheap zippers fail. Plastic snaps break. If your dog has previously broken out of a crate, that experience taught their brain “panic + persistence = freedom.” You need hardware that won’t reinforce the lesson.
Our full anxiety-crate breakdown compares the options; for anxious dogs the priorities are solid sides and escape-proof hardware that will not reinforce a previous break-out.
Whatever you choose, set it up in a low-traffic but family-adjacent spot. Not the laundry room. Not the basement. Living room corner is ideal — they want to be near you, even when scared.
Step 2: Map the Fear (Day 1-2)
Before you even open the crate door, spend 48 hours figuring out what the trigger actually is.
Watch carefully when your dog enters the room with the crate. What happens?
- Eyes go to the crate first?
- Body lowers, tail tucks?
- They walk wide around it?
- They sniff and walk away unbothered?
Each reaction tells you something different. A dog that locks eyes on the crate from the doorway with dilated pupils — often one previously crated as punishment — has learned the frame is a threat; that association must be neutralised before any training starts.
If you don’t know your dog’s history (rescue dogs, mostly), you’re guessing. That’s fine — assume the worst and proceed gently. Here’s a deeper dive on why dogs develop crate aversion — read it before Step 3 if you have time. The signs of past trauma are subtle but consistent.
Common trigger patterns:
- Crate-as-punishment in previous home
- Sudden noises while crated (thunder, fireworks, slammed doors)
- Being crated 10+ hours daily as a puppy
- Forced crating during transport in a vehicle accident
- A medical event while inside (vomiting, urination, no relief for hours)
You can’t fix the trigger directly. But knowing it lets you pace the next steps correctly.
Step 3: The 5-Day Calm Zone (Day 3-7)
Here’s where everyone screws up. They open the crate door and start luring with treats on Day 1.
Don’t.
For five full days, the crate is just furniture. Door open. Empty. Quiet. Pretend it’s a side table.
What you’re actually doing this week is building positive associations with the space — the room, the corner, the area near the crate. Not the crate itself. Yet.
The protocol:
- Feed your dog their normal meals about 4 feet from the crate. Not inside. Not next to it. Four feet away.
- Each day, move the bowl 6 inches closer.
- By day 5, the bowl is touching the open crate door from the outside.
- During the day, drop a small treat near the crate every time you walk past. Don’t make a thing of it. Just casual.
What this does: their brain starts logging the crate area as “where good things appear.” Not threat. Not pressure. Just a place where, sometimes, dehydrated chicken happens.
Done right, a fearful dog typically goes from refusing the room (Day 1) to lying within a foot or two of the crate voluntarily by around Day 6 — with no coaxing, no opening the door, and without ever cueing “kennel.””
If your dog refuses to even enter the room — okay. Move the crate. Smaller starting distance. The plan adjusts to them, not the reverse.
Step 4: The Crate Becomes Furniture They Use (Day 8-13)
Now you start placing things INSIDE the crate. Door is still open or removed entirely if your crate allows.
Six-day routine:
Day 8-9: Drop high-value treats just past the threshold. They have to dip their nose in. Most dogs will. If they won’t, the treats aren’t valuable enough — switch to something stronger (raw turkey, hot dog pieces).
Day 10-11: Place the treats further back — middle of the crate. Their whole head goes in.
Day 12: Place a frozen Kong about 18 inches inside. They have to actually step in to get it. Most dogs will commit at this point.
Day 13: Feed their meal inside the crate, door open. They walk in, eat, walk out.
Don’t close the door. Not yet. We’re still in trust-building phase.
A note about chew toys: this is where I lose people who bought a $4 plush squeaker. Anxious dogs destroy soft toys in 8 minutes. You need something rated for power chewers — the toughest power-chewer picks — or your “training session” becomes “fabric dismemberment session.”
By Day 13, your dog should be entering the crate voluntarily and staying inside for 3-5 minutes to finish their meal. If they bolt the second they’re done eating, that’s normal. Don’t push it.
Step 5: First Closure — The 7-Second Rule (Day 14-17)
Now we close the door. But only for 7 seconds.
Set up the camera. Drop a frozen Kong inside, lure them in, gently close the door. Sit on the floor next to the crate. Count: one Mississippi, two Mississippi… seven Mississippi. Open.
That’s it. Day 14, 7 seconds. Repeat 3 times that day, spaced out by hours.
The reason for 7 seconds: it’s almost certainly under their panic threshold. Whatever happens after closure, they barely registered before you opened it again. You’re showing their nervous system “the door closes, then opens, no big deal.”
Build the timing slowly:
- Day 14: 7 seconds × 3 reps
- Day 15: 30 seconds × 3 reps
- Day 16: 90 seconds × 2 reps
- Day 17: 5 minutes × 2 reps
If at any point they panic — vocalize, paw at the door, drool excessively — drop the duration by 50% next session. No exceptions. Pushing through panic teaches them that panic is the response and you don’t listen.
This is the step where most people fail. They get to 5 minutes on Day 16 because the dog “seemed fine,” then jump to 30 minutes on Day 17. The dog explodes. They reset to Day 1, frustrated.
Be boring. Be patient. Build the duration in increments their brain can absorb.
Step 6: Fake Departures (Day 18-22)
Your dog can now stay in the crate, door closed, for 5 minutes calmly. Time to add the hardest variable: you leaving.
But not really leaving. Not yet.
The protocol:
- Put dog in crate with frozen Kong, close door.
- Pick up your keys. Sit back down on the couch.
- Stand up. Sit back down.
- Walk to the front door. Touch the doorknob. Walk back.
- Walk out the front door. Close it. Wait 8 seconds. Come back.
- Walk out the front door. Close it. Drive around the block. Come back. (15 minutes)
23 of these “micro-departures” build up to one real-tolerance threshold. Spread them across 5 days. The dog learns that you leaving = nothing bad. You always come back. The crate is the reliable spot where good chews happen.
A small, severely separation-anxious dog might need around 31 micro-departures over 9 days rather than 23 over 5 — a lower threshold simply means the plan flexes.
Camera check during this phase is critical. You need to see what happens AFTER you close the door. Some dogs are dramatic for 90 seconds and then settle. Some look fine for 30 seconds and then escalate. The camera tells you the truth your dog can’t.
If they panic during a fake departure, you’ve moved too fast. Drop back to Step 5 timing for 2 days, then retry.
Step 7: Real-World Testing (Day 23-28)
By Day 23, your dog should tolerate ~30 minutes of fake departures with low stress signals. Now test actual short errands.
Short errands are 15-25 minutes. Coffee run. Quick post office trip. Not “I’ll be gone 4 hours, you’ll be fine.”
Use the camera. Always. Anxious dogs hide stress when you’re physically present — the actual measure of progress is how they behave while alone. Our Furbo vs Petcube comparison covers what to look for in a camera, but any phone propped up works fine for training.
Build duration:
- Day 23: 15 minutes
- Day 24: 25 minutes
- Day 25: 45 minutes
- Day 26: 75 minutes
- Day 27: 2 hours
- Day 28: 3-4 hours
Watch for warning signs on camera:
- Excessive drooling pooled on bed (more than a damp spot)
- Panting that doesn’t stop after 8 minutes
- Pacing, circling, repeated position changes
- Vocalization escalating (not the initial protest)
- Bar biting, paw trauma
If you see any of these consistently across multiple sessions, your dog isn’t ready for that duration. Back off. It’s not about willpower or stubbornness — their nervous system literally can’t handle longer alone time yet.
When It’s Not Working: 4 Red Flags
Sometimes, despite doing everything right, crate training fails. That’s important to admit honestly.
Stop the protocol if you see any of these:
Self-injury: broken teeth, bloody paws, raw spots from rubbing against the wire. This is severe. The crate is reinforcing trauma, not reducing it. Don’t push through.
Anhedonic refusal: by week 2, your dog refuses food inside the crate even with the door open. Something deeper is going on. Possibly a previous gastric event during crating. Possibly genuine phobia.
Vocalization escalation, not adaptation: normal protest barking decreases over sessions. If barking is increasing in intensity by Week 3, the protocol isn’t working — you’re sensitizing, not desensitizing.
Post-departure shutdown: you come back and your dog is unresponsive for 30+ minutes — won’t make eye contact, refuses water, lies still. That’s a stress collapse. Stop crating immediately.
If any of these appear, see your vet. Anxiety medication isn’t a failure — for some dogs it’s the missing piece. Trazodone, fluoxetine, or situational gabapentin can lower the baseline enough that training becomes possible. I’m not a vet, and you shouldn’t take medical advice from a dog gear blog. But please don’t rule out medication out of pride.
Honest Take: Sometimes the Crate Isn’t the Answer
Here’s something most “best practices” articles won’t tell you.
Some dogs aren’t crate dogs. Ever. No matter how well you train them.
Some dogs genuinely cannot be crated, full stop — for example a rescue with severe track-life or vehicle-accident trauma. What works for them is a different setup: a small dog-proofed room with a baby gate, a comfy bed and a camera. They feel contained without feeling trapped.
If you’ve worked the protocol carefully for 6-8 weeks and your dog still falls apart in the crate — consider that maybe the crate isn’t the right tool. There’s no medal for crate training. The goal is a dog who’s safe and calm when you’re not home. The crate is one option. Not the only one.
Frequently Asked Questions
How long does crate training an anxious dog actually take?
Plan for 4 weeks at minimum. Severe cases — previous trauma, escape history, vehicle anxiety — often need 6-8 weeks. If you’re in a hurry, this isn’t the right time to start. Wait until your schedule has 30 minutes daily for at least a month.
Can I crate train an adult dog, or is it too late?
Adult dogs are absolutely trainable. The protocol works even on dogs well into double digits in age. The difference is patience: adult dogs have more accumulated associations to override, so the timeline stretches. Don’t believe the “old dogs can’t learn” line.
Should I use anxiety medication during training?
Talk to your vet, not me. That said — for severe cases, situational medication (gabapentin or trazodone) prescribed during the first 2-3 weeks of training can lower the panic threshold enough for the protocol to work. It’s not cheating. It’s neurology.
Is crate training cruel?
Done correctly, no. Done badly — long durations, no positive associations, used as punishment — yes, absolutely. The crate is a tool. The way you use it determines whether it’s helpful or harmful. Most dogs, properly trained, voluntarily choose to enter their crate to nap by week 6.
What if my dog has been “successfully” crated for years but is suddenly anxious?
Sudden onset crate anxiety usually points to a recent event: a thunderstorm while crated, a household disruption, a medical event. Treat it as a fresh trauma case. Restart the protocol from Step 3, not Step 1 — they have prior positive associations to lean on.
My dog is fine for 2 hours but loses it at 3 hours. Why?
Threshold collapse. Their nervous system has a tolerance limit, and you’re crossing it. The fix is not “tough it out.” The fix is staying under threshold for 4-6 weeks until the limit naturally extends. Hire a dog walker for the gap if needed.
The Honest Ending
Done patiently, a dog that once injured itself trying to escape a crate can end up choosing to sleep in it voluntarily, door open, as a genuine safe space — but expect roughly five weeks, not five days.
Patience matters. Pacing matters. And admitting when the protocol isn’t working matters most of all.
If you’re starting today, do these three things:
- Get the right crate first (our anxiety-crate picks) — it’s the foundation
- Read about why dogs develop crate aversion before Step 2
- Set realistic expectations: 4 weeks minimum, not 4 days
Your dog isn’t broken. The training advice you’ve been given probably is.
Sources & Further Reading
This guide synthesizes veterinary behaviorist and trainer guidance on anxiety-aware crate training:
- AVSAB — Humane Dog Training Position Statement (2021): Peer-reviewed stance behind our positive-reinforcement framing.
- AKC — Separation Anxiety in Dogs: AKC guidance on anxiety triage and confinement risk.
- Fear Free Pets: Low-stress framework behind our 7-day desensitization protocol.
- AVMA — Dog Behavior Resources: Veterinary reference on behavior modification principles.
Related Guides

Huy Tong is the editor of Snout Hive. Based in Vietnam, he runs the site’s research process — analysing manufacturer specs, safety data and large samples of verified buyer reviews against veterinary and certified-trainer guidance. Not a vet or certified trainer; every source is cited and the methodology is public. Independent — no brand sponsorships.